You might have already read my blog post about making a wedding ceremony cake for my mum and her partner’s wedding. If not, go and read it now! Not only did I make a cake for the ceremony, I also made cakes for the party. Three two-tiered cakes to be exact. I wanted to share how it all went, and hopefully show that homemade wedding cakes are definitely possible.
 Design

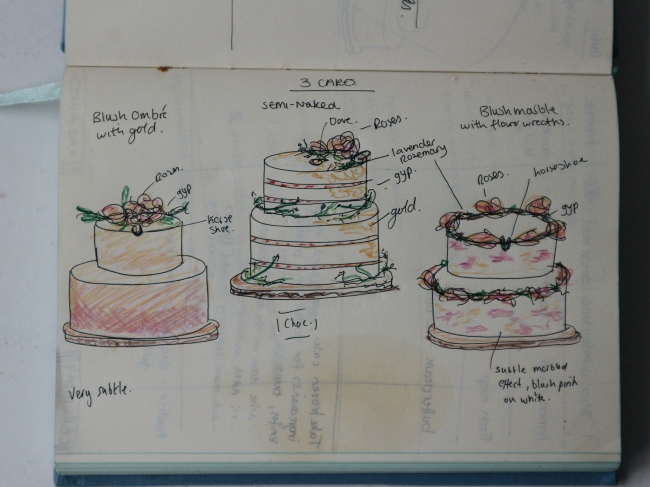
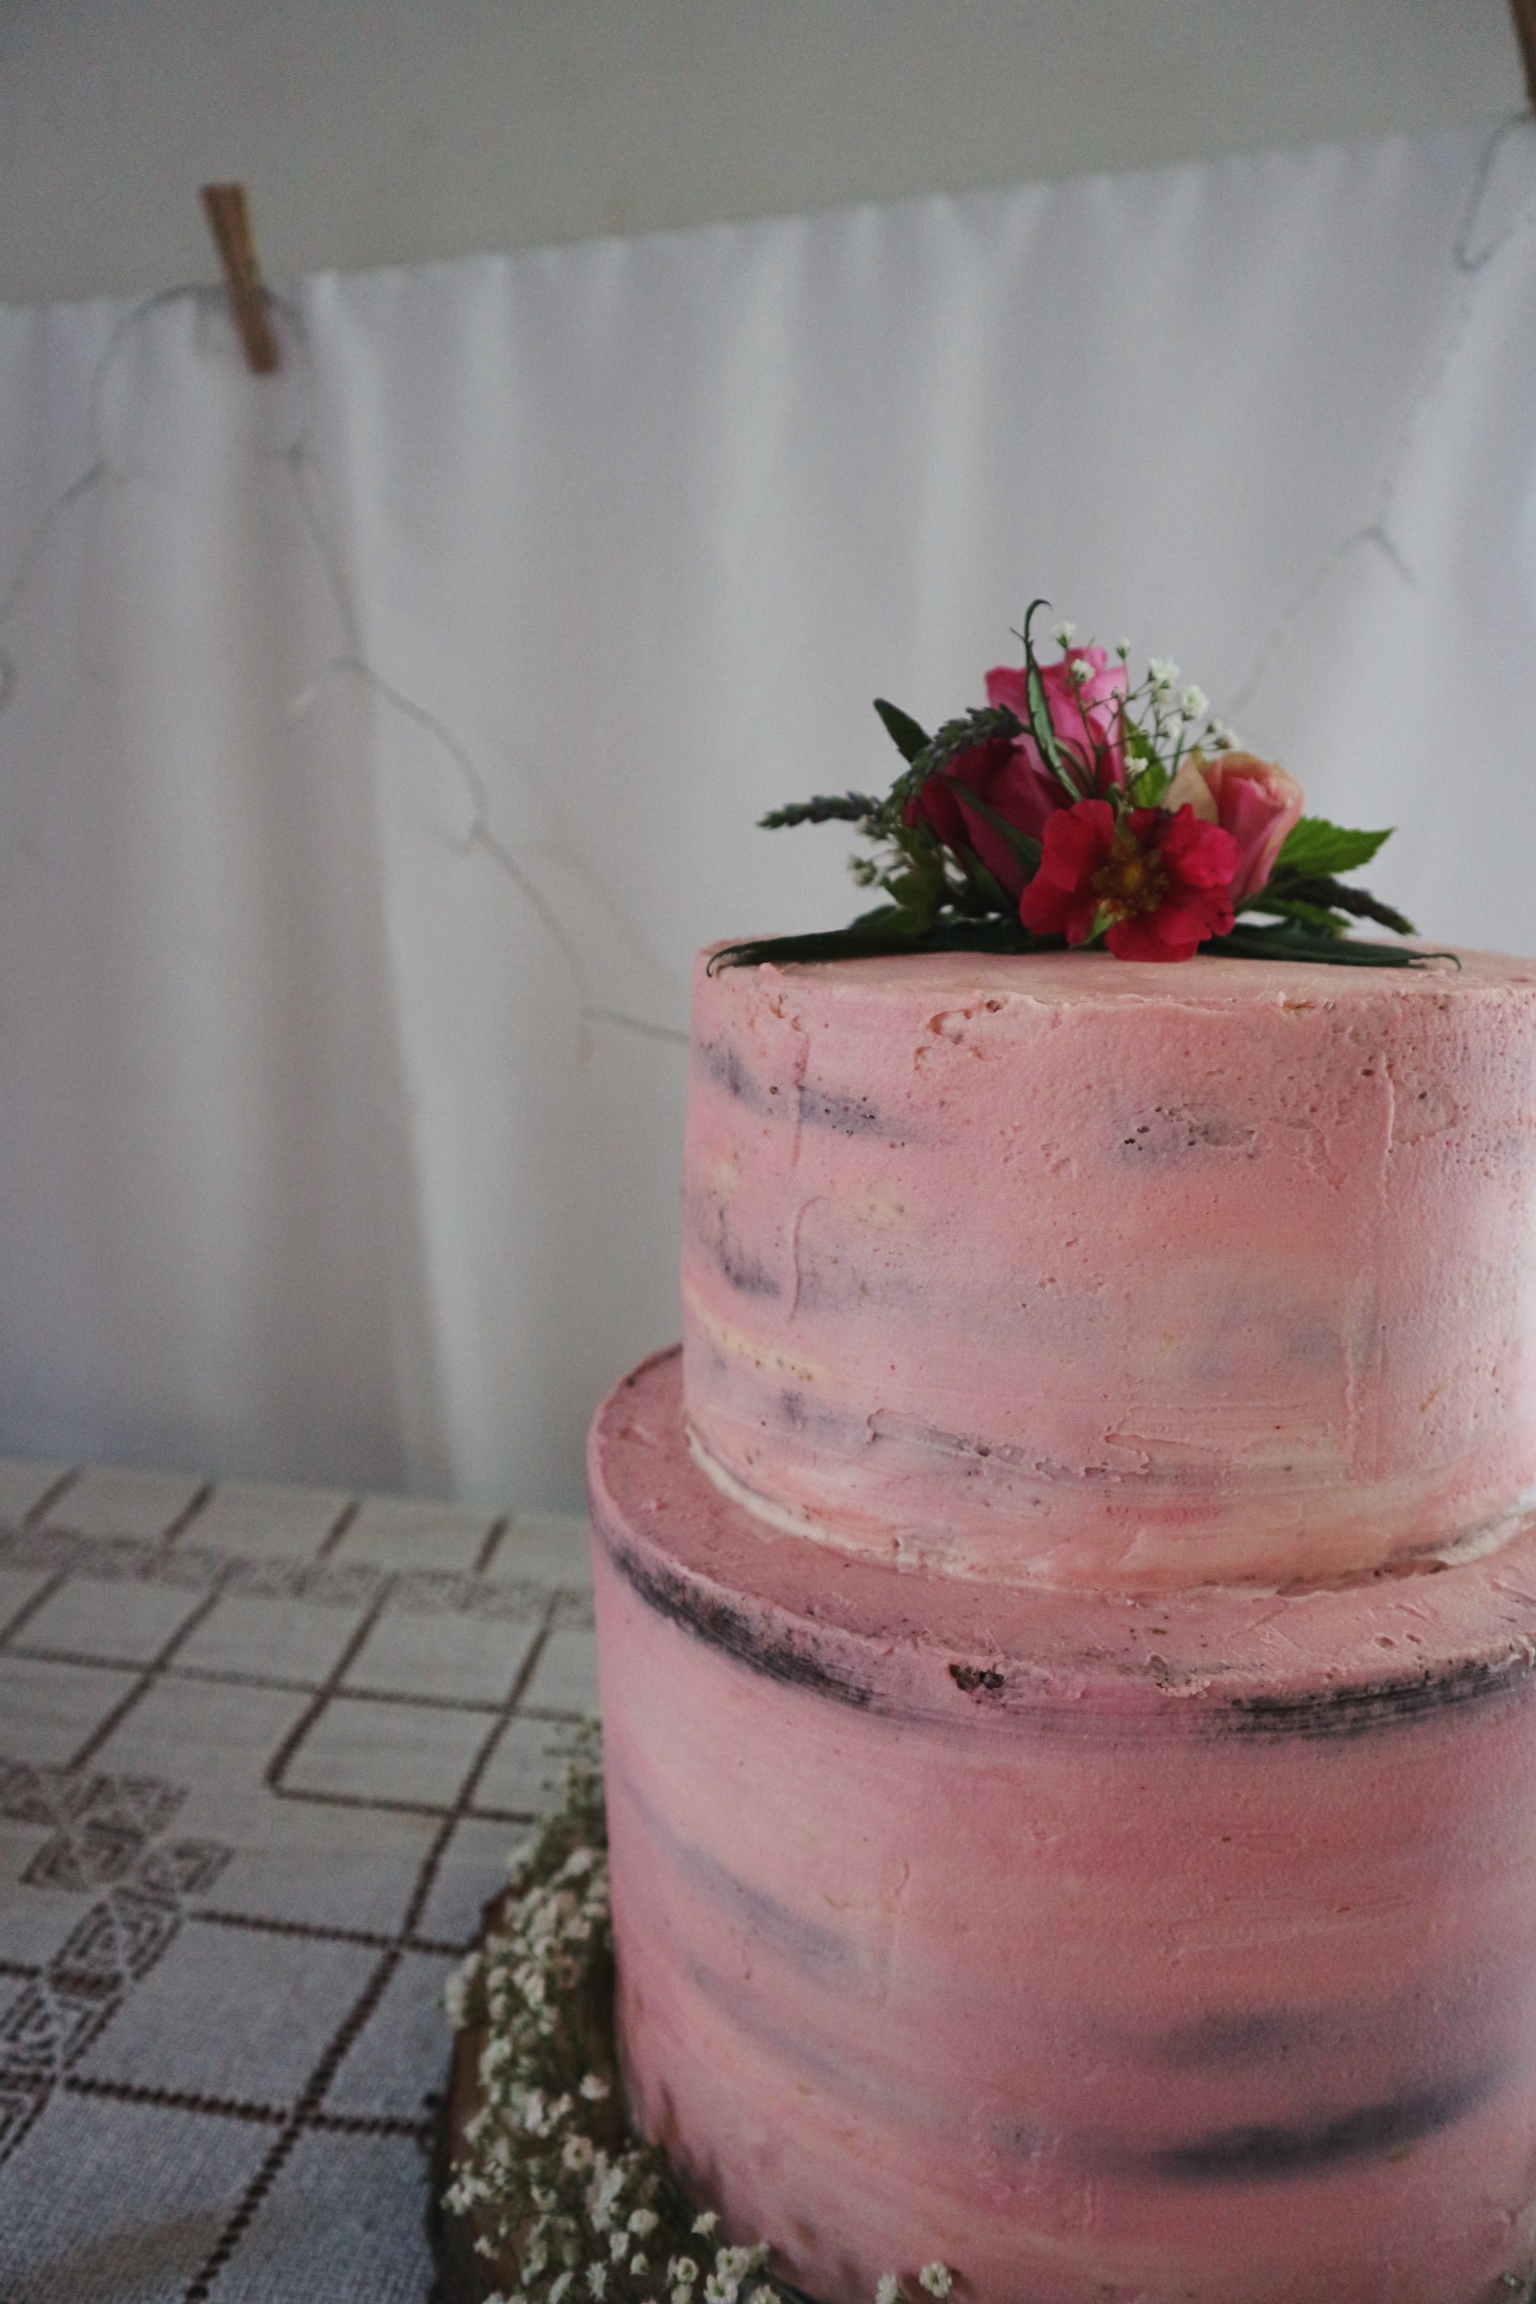
For the wedding party cakes mum gave me pretty much free rein in terms of design and flavours. I decided to stick with blush pink as the unifying theme between them, as it matched the bride’s dress. I’ve played around with ombre icing in the past, and really like it, so that ticked one box. For the second, I decided on a watercolour effect (which I had already done a few practice runs for). The third was classic semi naked effect with the filling showing through. All of them were to be decorated with fresh flowers from mum’s garden. As I didn’t know what I’d be getting flower-wise, my ideas were less fixed on what that element would look like.
When I was deciding on flavours I wanted to stick to something fairly classic and make it all from scratch. I also really wanted to make one of them a carrot cake – my mum and sister always order carrot cake when they have days out together and have a leader board I really wanted to be part of! The final three flavours I decided on were:
Lemon Maderia Cake soaked in Lemon Syrup filled with Lemon Curd covered in Lemon Buttercream
Chocolate Cake soaked in Chocolate Syrup filled with Whipped Chocolate Ganache covered in Vanilla Buttercream
Spiced Carrot Cake soaked in Orange Syrup filled with Orange Mascapone covered in Vanilla Buttercream

Portion Size
I read various guides about estimating cake size for portions and none of them filled me with much confidence. It turns out that ‘wedding cake slices’ means a teeny little sliver. Knowing how much my family like cake, and that the cake was the full dessert option for everyone, I decided that I’d go for what I considered a portion – and by that I mean a decent slice. Now my mum had told me to make 100 portions. I decided to er on the side of caution and round up to 150 portions to be on the safe side. What mum didn’t tell me was that she had already done a little bit of rounding up! When I say I over-catered, I really mean it. Each top tier was three 19cm layers on top of three 23cm layers for the bottom tier. There was enough cake in the end for most people to try two flavours, and we took home two of the top tier cakes.
Preparation
It’s also important to know that I live about 150 miles away from my mum. Rather than risk the horror show of transporting decorated cakes in a car with no air-conditioning, I made the cakes the weekend before and froze them wrapped tightly in several layers of cling film. The only problem with this was that my freezer wasn’t really big enough. There were a lot of strange meals that week as we ate through everything I turfed out in favour of cake. I’d also recommend freezing in stages. The chocolate cakes were slightly more delicate in structure, and I managed to squish two layers so badly I had to remake them later in the week. I transported the cakes frozen, and they defrosted slowly on the way.


Decoration
I spent about 10 hours the day before the party filling and stacking the cakes, crumb coating each tier and then icing them, putting them in the fridge in between (thankfully there was enough room). I kept the tiers separate at this point to make transport easier. As I went, I had to slightly change my plans. My chocolate cake was the neatest with the most consistent layers, so I decide to make that the naked cake.
I also discovered at this point that the cake board I had bought for the top tiers were the wrong size. I improvised with some circles of card cut to size and covered in cling film, which actually worked very well.

Finishing Touches
On the day of the party, after spending the day putting up bunting and fairy lights, I got my boyfriend to drive me and the cakes down to the venue as I didn’t trust my ability to drive smoothly. I was a nervous mess all the way (it was very hilly!) but they arrived intact. I pushed five straws into the bottom layer of each cake and very carefully placed the top tier on each. I had a bag of frosting and spatulas with me, and I spent a while tidying up edges and the slight gap between the tiers.
 Adding the flowers was the fun part. I started with the middle cake and went with my instincts. As the flowers on the middle cake ended up being offset, I wanted the cakes flanking it to almost face inwards. I was very lucky to be loaned some wooden cakes stands by the lovely Rob from catering company Posh Nosh and they really set off the colour and rustic feel of the cake. The groom, Mark, is also a very talented woodworker, so it felt apt!
Overall, I was completely delighted with how all three cakes turned out. I never dreamed they’d turn out this pretty, especially as I had never made a two-tier cake before. I did sample each cake, and was really pleased with the texture and flavour of each. Hearing people enjoying my cakes was a lovely thing, but even better was how happy the bride and groom were. Huge congratulations to my mum Mandy and her lovely husband Mark.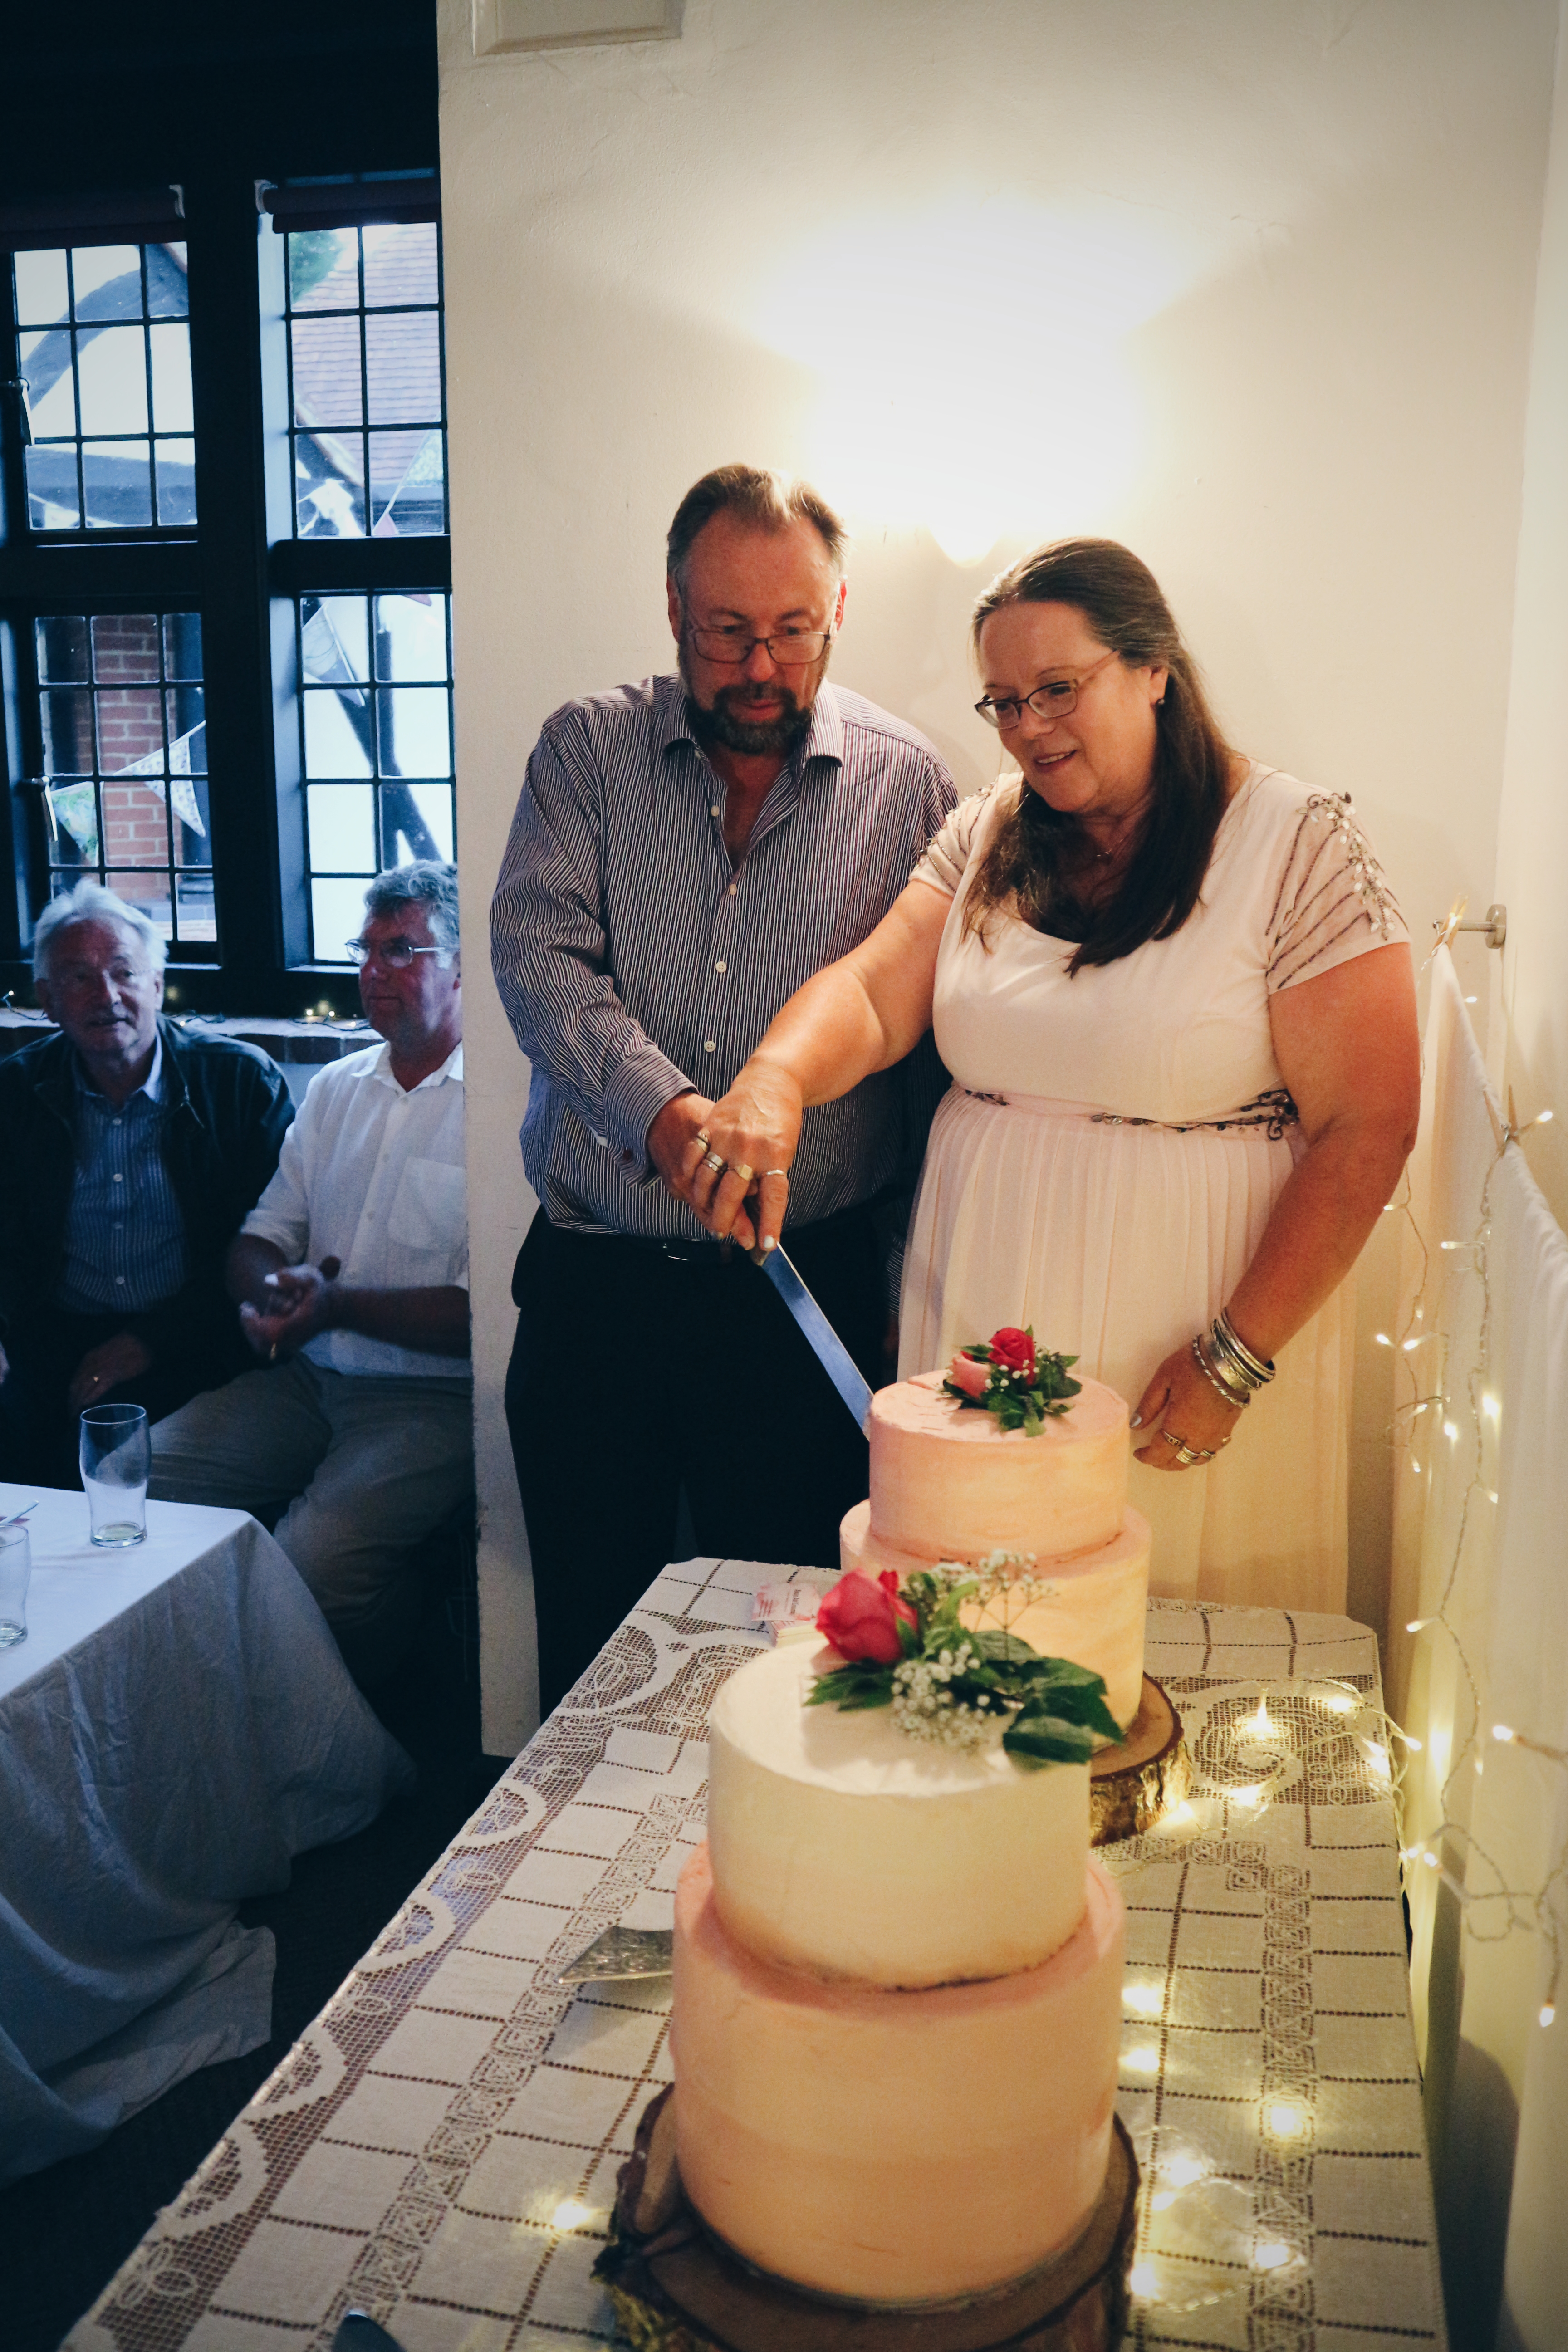

The cakes were amazing! Well done! We loved them… An amazing job. Thank you. Mum
With regards to the carrott cake leaderboard, after due consideration….. Better than all time number 2 ( Tate Britain privet members tea room) equal first with a vintage tea room in Rotarooa North Isd, New Zealand!!!
Mum
Gorgeous cakes!
Thanks Annika! I’m so chuffed with how they turned out 🤗
Mmmm! Yum! Congratulations to your Mum:)!
Thanks so much Tracy! 💖
Congratulations… I guess there was no more room in the fridge for any other food. I am sure you did your Mum proud too 🙂
Just enough room for the pizza we had for dinner – I needed it after a day full of sugar 😄
Stunning! ❤